The Beginners Simple Guide to Choosing the Correct Microphone for the Job.

Everything in audio is a balancing act.
Everything in audio is a balancing act. If you want higher fidelity, you have to choose a less robust mic. If you want durability, you have to sacrifice some fidelity. If you want convenience, you have to forgo quality. There is always a trade-off. The simple truth is, choosing a microphone is selecting the most appropriate tool while relinquishing something you don't need at the time being.
So you have a session booked at a studio to record some vocals, and they have an actual mic locker. When you open up the locked cabinet of microphones, choosing a microphone can be daunting. There are small and large mics; some are shiny, some are beat up, and some are made from gold. How do you know which microphone to choose for the job? Today we are going to discuss the literal quick and dirty way of selecting microphones without getting overly scientific. But let me preface, the principles I will discuss are grounded in acoustics, physics, and electronic engineering; I am just going to leave out all the math and simplify this as best as possible.
Small vs. large-diaphragm

Neumann KM184 Small diaphragm Microphone (Left) vs. a Neumann TLM 103 large diaphragm microphone (Right)
Picture Courtesy: Neumann.com
Microphones come in a variety of sizes. Large-diaphragm microphones tend to pick up lower frequencies better because they can capture more of the audio wave. However, because there is more diaphragm material to be moved, there tends to be a less instantaneous response. More mass means that it takes more air pressure to move the diaphragm because there is more material. If it takes more air pressure to move more material, there is a latency from when the air pressure first touches the diaphragm to when it fully starts to move. Think about trying to push a car. At first, the vehicle doesn't move. But once you get enough momentum and energy to get it rolling, it carries much easier. Low frequencies tend to have more energy behind the wave, so they get the diaphragm moving relatively quickly. But to have a higher frequency wave, which requires less energy to move forward, will have a more challenging time getting that large diaphragm to move. The waves will sort of bunch up and then finally break the plane of friction. However, the result is a less accurate portrayal of the soundwave.
Dynamic vs. Condenser
Dynamic microphones are the workhorses of your microphone universe. These are also known as moving-coil mics. Dynamic microphones are very robust, can take a beating, and because of this, are often the types of mics you see in live music. The microphone works by electromagnetic induction, which means that you need to move a piece of wire through a magnetic field physically. Electromagnetic induction is often achieved by placing the piece of wire or coil of wire right on the diaphragm and letting the air pressure of the sound move both the diaphragm and coil. More mass results in more weight, and as we say in the large vs. small-diaphragm discussion, there is now less opportunity for clarity. So, you can have robustness at the loss of clarity.

Moving Coil vs Electrostatic
Picture Curtosy: ledgernote.com
Condenser microphones are those mics you often see in studios because they are more fragile than their dynamic counterparts. These microphones work off the electrostatic principle, which means that one side of the capsule needs to be powered. When you see a +48v on your console or interface, this is the button you need to press to make these mics work. Condenser mics are often more accurate because they require minimal sound to get the diaphragm moving, thus capturing all that detail in your instrument. However, too much SPL can force the diaphragms to touch, and thus shorting out your microphone. So, you can have clarity at the loss of robustness.
A Note about Ribbon and Tube Mics
Tube and Ribbon mics are often in their own class. A Ribbon mic is especially a more accurate dynamic microphone, at the cost of robustness. Ribbon mics rely on a tiny piece of foil (like tin foil) to flap around in the wind of your music. This foil happens to be within a magnetic field and thus uses electromagnetic induction. These mics rarely are used in live sound and therefore are more relegated to the studio setting.
When you tap the screen at a particular beat, more or less sand falls out. That sand falls onto the table and causes a sand representation of your music.
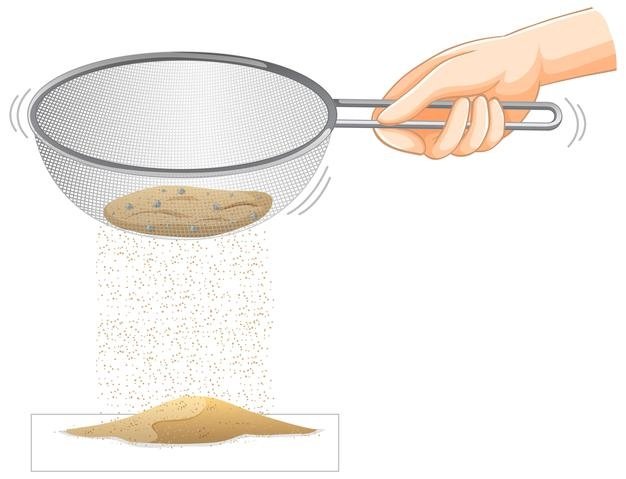
A tube mic is a type of powered microphone. It's similar to a condenser, where it requires external power to make it work. But the difference is that the tube mic usually requires an external power source since +48v is often not enough to get the tube warm. Tube mics need a lot of power to warm up as a function of the vacuum tube design. The tube itself is an older design. It requires part of it to get hot enough that it wants to lose electronics. When our music enters the mic's diaphragm, we cause electronics to sluff off the heated cathode. The sluffed electronics then fall on the anode and thus create a voltage that's similar to your sound. Think of it this way… you have a sifter or screen full of sand. When you tap the screen at a particular beat, more or less sand falls out. That sand falls onto the table and causes a sand representation of your music.
Polar Patterns
Polar patterns represent how the volume of a sound is affected by the angle it enters the microphone. There is a point where the sound is on-axis, which means that the microphone will reach its full volume potential. If it is off-axis, then there will be some reduction in the volume, how much is represented by the rings on the polar pattern.
Angle dramatically changes the sound of a microphone, not just by volume but also by tone. Recording engineers spend a meticulous amount of time experimenting with angles. What is the right angle for the proper tone at the right distance? The answer to this question is an entire lecture itself, if not an entire semester class or study.
There are two main types of polar patterns you will see in practice; Directional and Omni Directional. Omnidirectional means that the microphone (in theory) will pick up equally from all sides, even the bottom. A directional microphone has a few different flavors, but you will mostly see cardioid patterns. A cardioid pattern means that it picks up the best directly facing the mic and rejects sound from the rear. This type of pattern allows you to have more control over the recording process and capture your sounds. So, for example, if you are recording a vocalist, you would want to put them right in front of the mic. Suppose the vocalist is in front of a guitarist. In this case, the guitar will bleed into the vocal mic because a cardioid pattern pics up mainly in the front. To reduce the bleed-through of the guitar in the vocal track, move the guitar in front of the vocalist. The mic will pick up mostly vocals because a cardioid pattern rejects sound from the rear.

Cardioid Polar Pattern
A cardioid pattern means that it picks up the best directly facing the mic and rejects sound from the rear.
When we place microphones in front of instruments, we as engineers pay particular attention to angle. Where is the microphone pointing? What is behind it? Could other unwanted instruments get into this mic?
A note about Frequency Response Charts
Frequency response is probably the most in-depth topic regarding microphone selection. I will try to boil it down to a simple principle: Find a flat frequency response with a range of 20Hz to 20 kHz.
Every microphone has built-in EQ. The EQ is a function of the design and circuitry of the microphone. The manufacture usually supplies a Frequency response chart that shows the unique EQ curve of the microphone. People often choose microphones dependent upon these factors to curate the best tone possible for their recording. However, the beginner should find the flattest curve you can get for microphones. Flat frequency response will give you the most accurate sound possible without any alterations. You also want a microphone that can pick up low frequencies as well as high frequencies. Most microphones run in a range from 20Hz to up to 20,000 Hz. This range is also the upper and lower limits of human hearing, so anything less or more than this isn't needed.

An example of a relatively flat frequency response chart.
Choosing the right mic
My colleagues and I have had many debates about why we chose one microphone over the other. But suppose you follow these principles regarding the different aspects of microphones. In that case, you will most likely choose the correct microphone with a suitable frequency response for your project.
Now that we know some simple principles about microphones, this should be enough information to decide what to choose for different instruments.
Let's make an assumption: You are going to forget about frequency response for the time being. Let's focus on answering some simple questions:
Is the instrument very loud?
Does the instrument have more low, mid, or high frequencies?
Bass Guitar Amp: Yes, this is loud. So if we have a loud instrument, then we should go towards a dynamic mic. It has more low and mid Frequencies. We should be using a larger diaphragm mic. Examples: Sennheiser e609, AKG D112.
Guitar Amp: Is the music loud or soft? If soft like Jazz, you could use a condenser, but I will move towards a dynamic microphone if it is loud. This instrument tends to have more mid-range and high frequencies. I would go towards a small capsule mic. Examples of dynamic mics: Shure SM 57, MD 421 Examples of condenser mics: Shure SM 81.
Kick Drum: Loud and low frequencies! Dynamic mics! Examples: Shure Beta 52.
Snare Drum: Depends on music again. Loud then Dynamic. Soft like Jazz, then condenser. Examples for Dynamic: Shure SM 57, Audix i5. Examples of condenser: Neuman KM 184.
Acoustic Guitar: These tend to be more mid or soft instruments. Here, I would aim towards a condenser mic. Acoustic instruments, in general, tend to have a lot of harmonic content, so we want to capture all the high frequencies possible. A small-diaphragm condenser mic would be the way to go—examples of condenser: AKG 451B
Violin: Again, these are a lot softer in volume than an amplified instrument. We also want to capture a lot of clarity and high frequencies. Small Diaphragm condenser mics again. Examples of condenser: Shure KSM 137
Vocals: Vocals are sometimes an exception to this general rule of thumb. The human voice is a lower frequency instrument compared to a violin or an acoustic guitar. The human voice has a limited octave range compared to acoustic instruments. So here we want to go with a larger diaphragm microphone. But some singers can sing loud. So microphones such as the SM 58 are considered middle diameter diaphragm microphones, which can very well reproduce low and mid frequencies. They are also dynamic mics so that they can handle significant SPL. But suppose you are in a studio setting. In that case, a Large-diaphragm condenser microphone will do well at capturing the lower frequencies of the voice but also the accurate detail of the upper parts of the vocal—examples of Large Diaphragm Condensers: Neuman U87, TLM 103, AKG C414.
These are just some of the examples of what you could use for microphones for particular instruments. For you teachers out there, the idea behind this article is to boil down the information into simple-to-use principles to take just a tiny step in the direction of audio quality. Again, this article did not intend to be an in-depth post about every function of a microphone. Still, it's a good starting point for those beginners who want to think a little deeper about the sound they are capturing.